Tuesday, November 28, 2017

A Superhero Shirt

Sewing for boys is hard. Not hard to do, but hard to decide. It sometimes feels like "girlie" fabrics outnumber the boyish ones, 3:1, and most of the good fun sewing pattern shops I find online are geared towards girls. There's a lot you can do by adding frills and ruffles to a girl's top or dress, but typically all the boys' patterns I find are for basics: the kind of stuff it's cheaper to buy in the store unless you manage to find Just the Right Fabric(tm).

Fortunately, thanks again to Sweet N Charmed, I got a hold of this lovely comic-book character print in a Cotton Jersey stretch knit.


When I pulled it out of the box, my son grabbed it and started dragging it around with it like a blanket. Well, OK: I can take a hint. I haven't made him anything since his Chompers Hoodie over a year ago, and my daughter has scored a Shark Dress and a Shark Shirt (which she never wears, sigh) during that time. Plus, I'd already put together a raglan for myself: how hard could a raglan for a toddler be?


I had a gift certificate from Etsy, so while I drooled a bit over the boys' raglan from New Horizon Designs, I ultimately went with the Explorer Raglan Pattern from Made by Jack's Mum. I had to contact MBJM to ask about imperial/metric (she's from the UK) and she responded quickly to assure me the pattern contained English units, so I bought the pattern. But when I printed it out, the proportions of the pattern were... well, they weren't very toddler-like.


My son wears an 18-24m on top, and so I thought I'd make a 2T. But when I went to double-check the measurements, I found that his waist measurement went with a 3T which, OK, that's reasonably close. But then the length measurement indicated by the pattern was FOUR INCHES longer than the top he was wearing. That's a long shirt on a kid who's under 36"!


I ended up making the shirt in a 3T as indicated, and hemming it under by about an inch and a half, rather than the recommended 1/4". It's still a long shirt, but not SO long that it looks out of touch with the style. I'm just lucky he's long & lean for his age, or I'd be hemming it a LOT more.


Also, I've gotta say - not a big fan of 1/4" seams with knits... It's a little nervewracking to manipulate a stretchy fabric with so little room for error - although I guess it does make for efficient cutting!


That said, I am very pleased with the end result. The shirt turned out super cute, and it was incredibly, amazingly fast to make. Like, I cut it out one evening after dinner and sewed it entirely the next, which NEVER happens with my busy schedule. Plus, it looks good on: and little I is thrilled to have a "Hulk" shirt made by his mother. I think my only mistake was making short sleeves in September, but that's easily corrected, as I will certainly be making this raglan again.


Linking up to Let's Bee Sewcial for fun.

Sunday, November 19, 2017

A Super Alternative for a Quilt-worthy Friend

Despite the title of this blog, I haven't really had much time for quilting since my son was born in 2015. I'm making slow, on-again-off-again progress on my Christmas Traditions quilt, but with the tiny windows I have to sew, large projects have taken a backseat to smaller, more manageable things that can be done in 3-4 sittings or so.

So, friends who used to be quilt-worthy are now getting garments. Like this gem. We've been good friends with this couple pretty much since their daughter was born a year after ours, and they're even bigger "classic" gamers than we are. So when I saw this print on Memorial Day sale at Sweet N Charmed, I knew it was time for their "quilt alternative."
 

For the pattern, I decided on the Paisley by Simple Life Pattern Co, because 1) I'd had such amazing success with the Isla and 2) the Paisley has an open-backed detail that's to die for, which I knew their daughter would love (see the photo from the SLPCo site below)


One of the fun parts of this dress (and this fabric) was doing a lot of fussy cutting. The repeat was such that I could easily make sure the scene was centered, and this dress did rely fairly heavily on clever cutting and placement of bricks.


The finished product has a fussycut brick neckline (no exposed seam method), and some clever placement of the brick fabric to create the illusion of a brick binding on the sleeve.


I also used the short sleeve option, the regular back (as opposed to the modest cut which is ALSO included), and the full circle skirt. I briefly considered dropping the waist a bit (my daughter's friend is tall), but was glad I ultimately didn't because keeping it where it was meant more long, flowy skirt to play with.


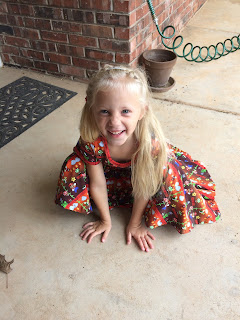
Entertainingly, my daughter came across me as I was cutting it out, and asked who the dress was for. When I told her, wrinkled her nose and said "I don't think my friend will like that fabric very much." Oh, my sweet summer child, I thought, you have no idea who I am trying to please with this gift. Of course, once she saw the completed project she was very happy to model it for me.


Twirling and playing in that skirt certainly made her day, and, I think she might be suffering a little dress envy! I did have one major Dress!Fail that I do hope to correct next time: when I topstitched the back it stretched the fabric and produced some puckering. I'm hoping the puckering will be less visible on my daughter's friend (A is a little smaller than her), but per the SLPCo fan page on facebook,  I'm definitely going to have to try a longer stitch length on topstitching if/when I make this again. 


Which - I think I need to. It's such a versatile pattern, and look at that face!